 |
Documentation
|
 |
Documentation
|
In order to connect an eNetCube device to a MQTT broker, the broker has to be installed and configured first. For testing purposes we use the mosquitto v2.0.14 an a local windows PC.
The first line defines a listener on the port 1883.
The second line allows connections without any authentication.
For security reasons this configuration should not be used in a network which could be compromised, since anybody and anything could connect to the broker and access/change the data. For more security a password file can be used.
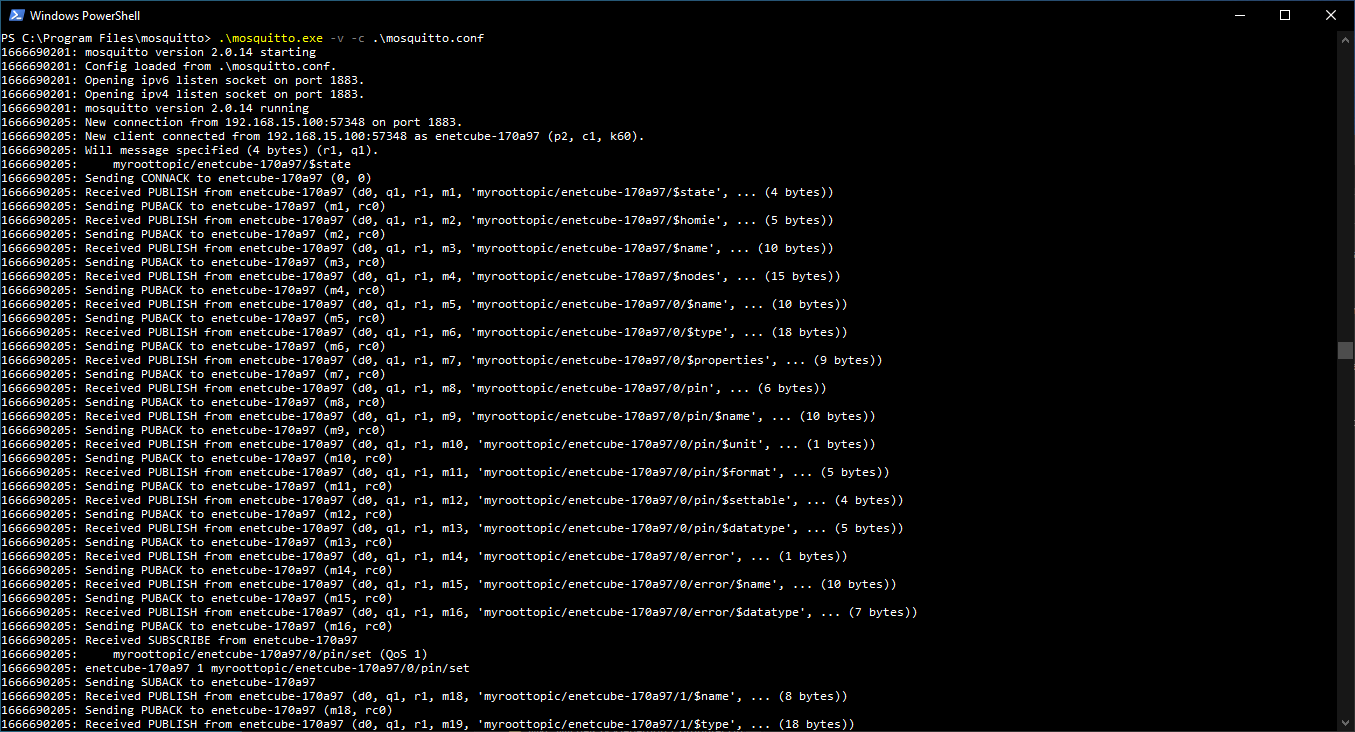
Starting the broker with the config file we are getting the following output:
The next step is to configure the eNetCube device to connect to the broker. This can be done on eNetCube's homepage under Settings tab.
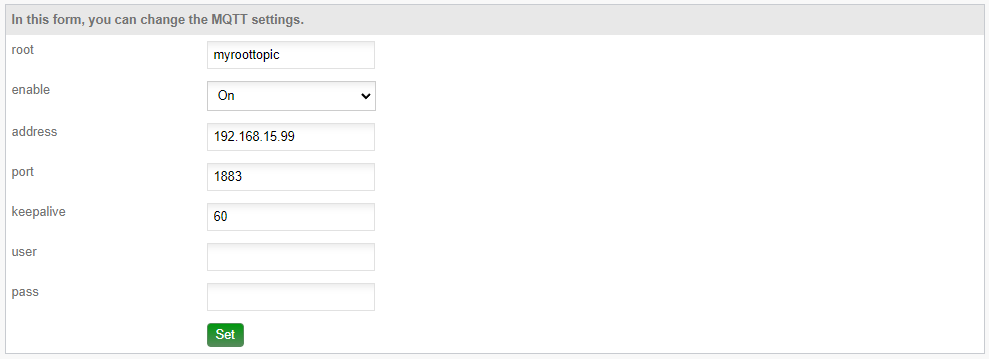
Clicking on the "set" Button, we should immidiately see output from the mosquitto broker
Using wireshark the messages can be examined more closely.
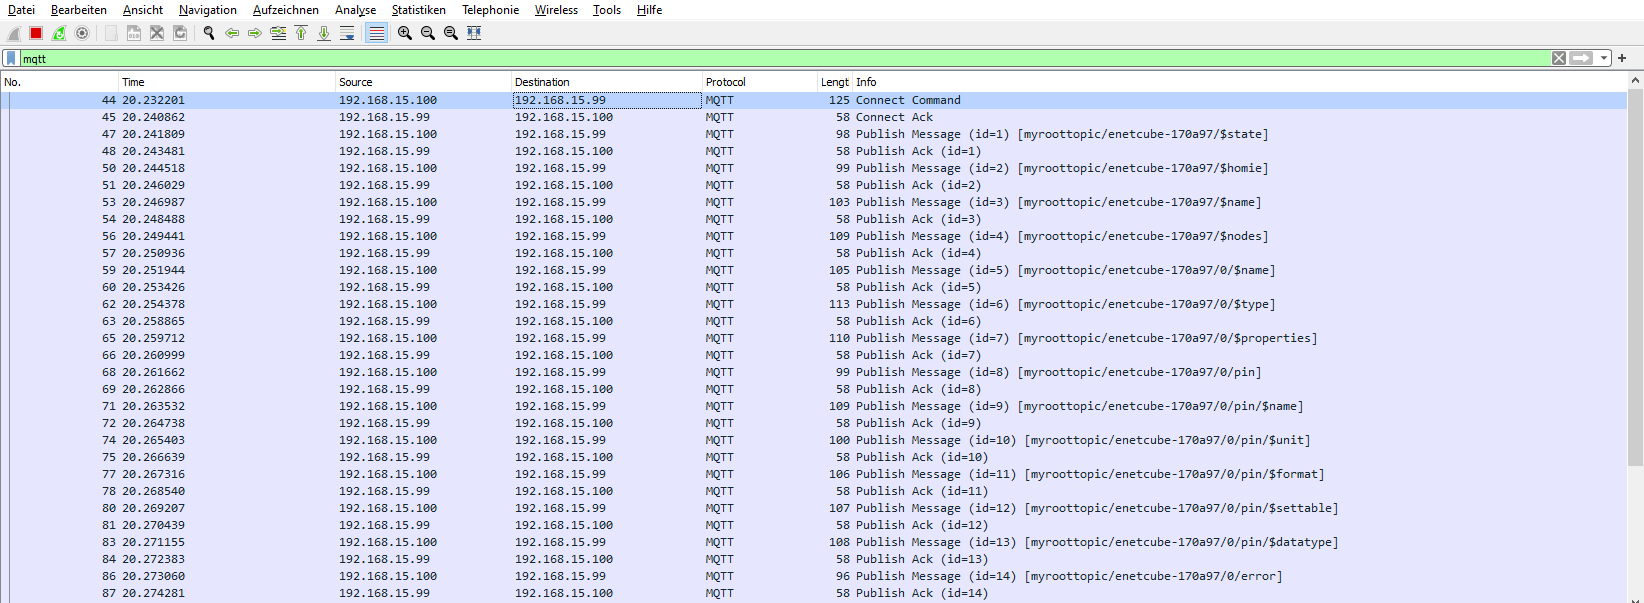
As we can see, the eNetCube is publishing all it's messages to "myroottopic/enetcube-170a97".
The device used here is an eNetCube-01-01-01. Its main IOs are two relays. In order to switch one relay on/off, we need to connect to the broker first.
For that we use the free tool "MQTT Explorer".
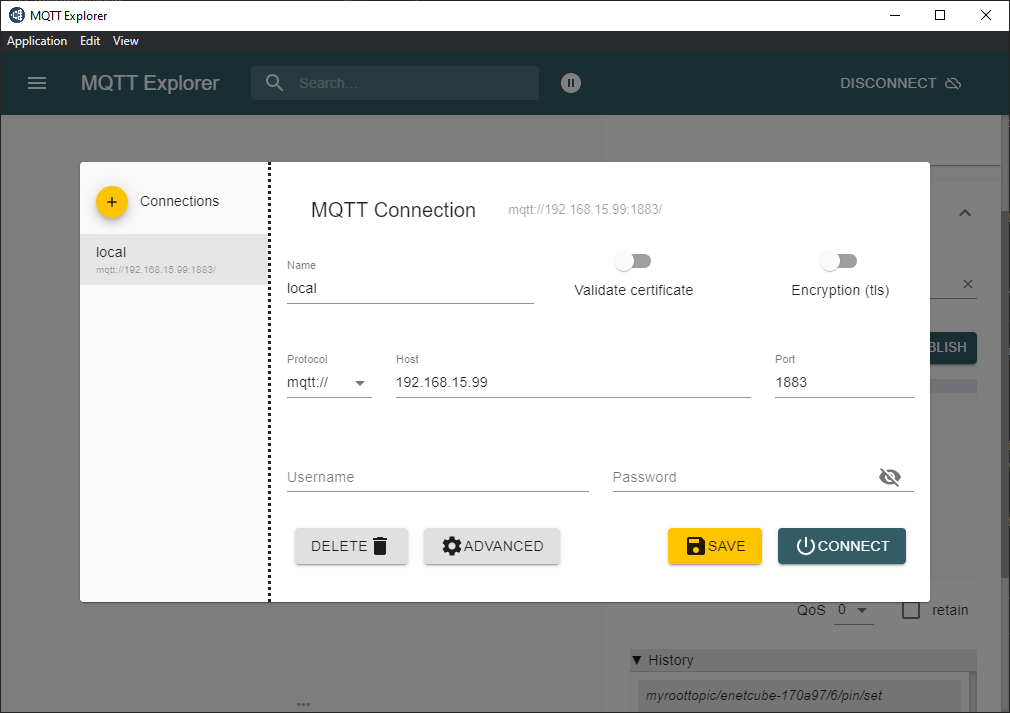
We set the address, port etc. just like in the eNetCube configuration. After clicking on "connect" we should see a tree view of all the retained messages on the broker.
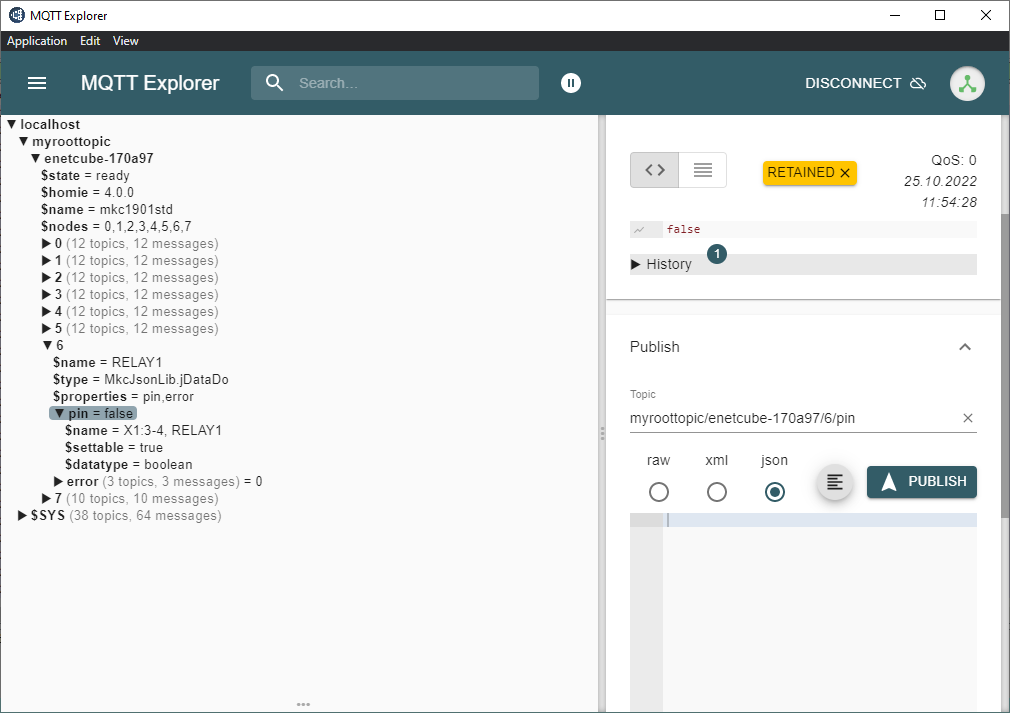
The node for Relay1 is located under "myroottopic/enetcube-170a97/6".
As we can see the property "pin" is currently "false" and it is settable (the $settable attribute under "pin"). This means, the eNetCube listens to the topic "myroottopic/enetcube-170a97/6/pin/set", and will switch the pin if the correct data is sent to it.
On the right side of the MQTT Explorer we can publish messages. There we enter the topic "myroottopic/enetcube-170a97/6/pin/set" and as data we send "true" (without the quotes).
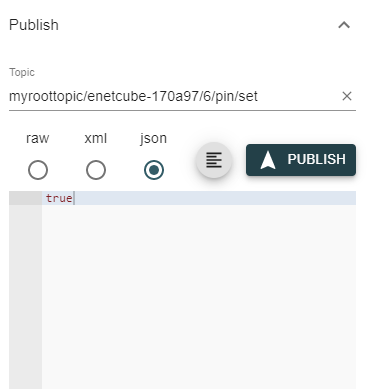
Clicking on publish will switch the relay1 from off to on. After switching the relay, the device will publish the new state to the "myroottopic/enetcube-170a97/6/pin" topic.

In wireshark we also see the messages

Note, that in wireshark, we only see the communication between broker and the eNetCube. The communication between the MQTT Explorer and the broker is not visible in this image.