Overview
Landing Page
Description:
| 1. Link to the sitemap | - | This links to a site containing a list of all the subpages |
| 2. Breadcrumb | - | This shows the current location in the homepage. the first element is always the process name and links to the landing page |
| 3. language selection | - | These links allow to change the language of the site |
| 4. main navigation | - | Used for navigating the eNetMinis homepage |
| 5. status | - | Shows the current status eNetMini's services. |
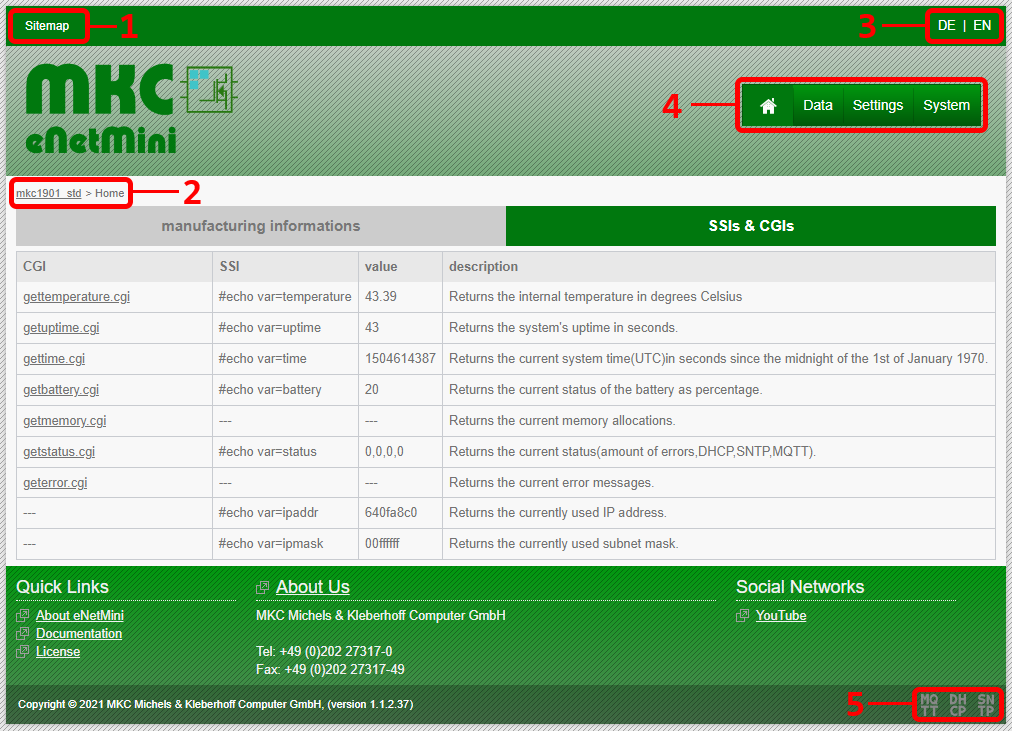
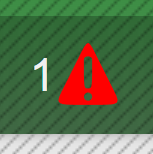
Service icon:
grey = off, light green = on | In case of an error, an error icon with the amount of occurred errors is shown. | In case of connection loss, an icon indicating no connection is shown. |

status active/inactive example
|
error icon
|
no connection icon
|
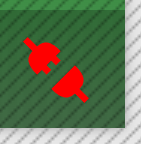
Navigation
The eNetMini Homepage is split up in 4 sections:

Navigation
1. public section
In this section everything is available without any authentication. This includes:
- the landing page
- the sitemap
- and the cgi's listed on the landing page
2. data section
This section can be found under the "Data" menu on the main navigation and can only be accessed by RO,RW or SU user. It consists of 2 pages:
Data submenu
HTTP Access page
This page contains a form for changing RO User's username and password.
There are two more HTTP Access pages: for RW user and SU user in their corresponding sections. These pages look the same as this one.

HTTP Access Page
Data page
The Data page provides an overview on all the IOs and forms to change the analog and digital outputs.
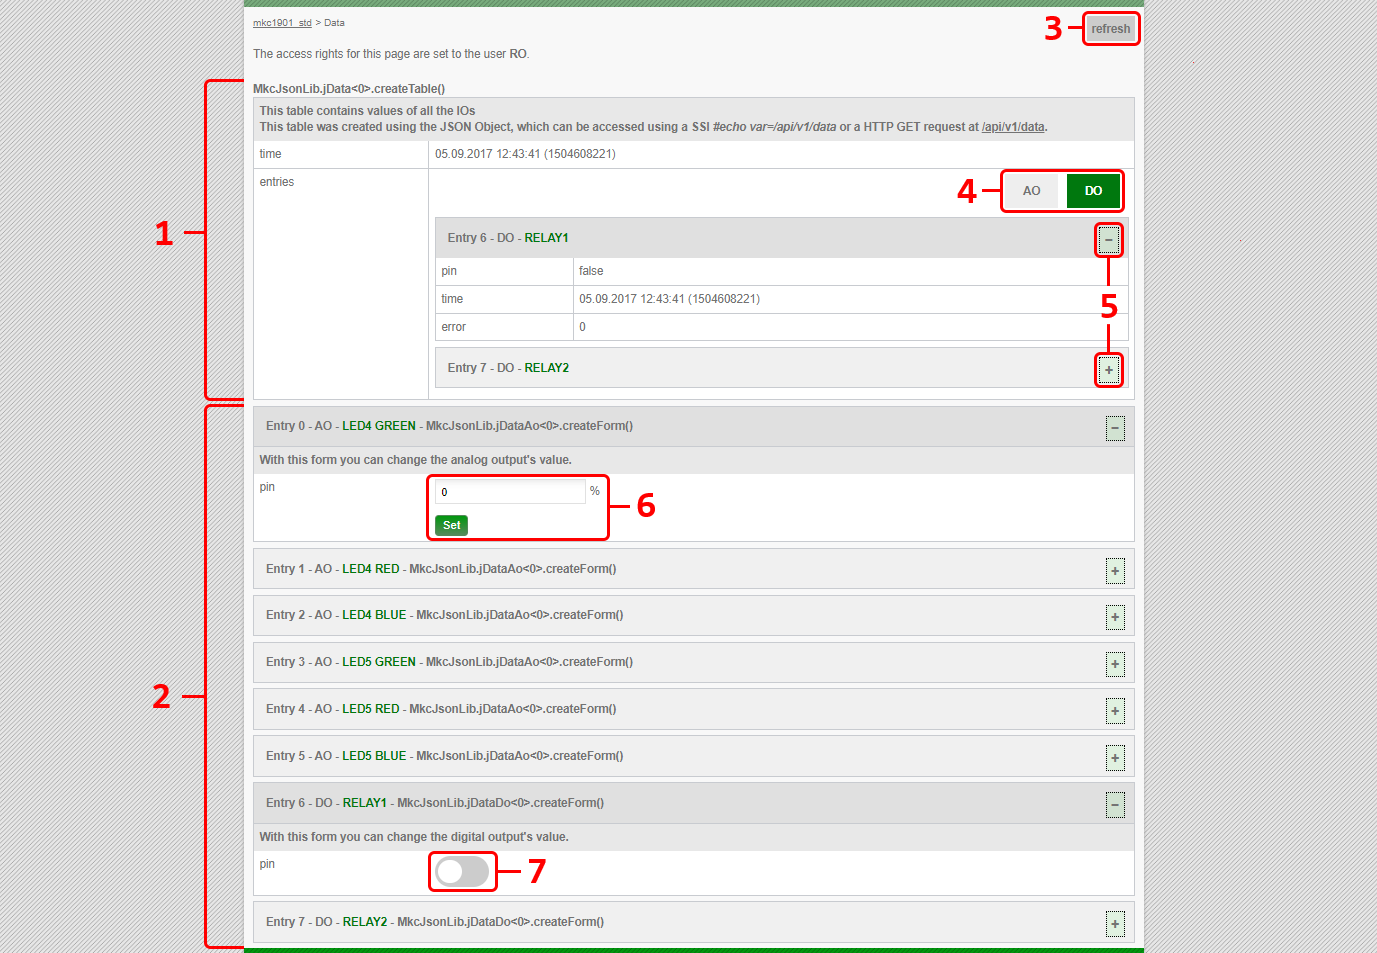
Data Page
- The first table shows the state of the IOs
- Below the table, there are the forms for changing the state of output nodes.
- This button fetches the data REST API endpoint and rerenders the tables and forms with the new content.
- These buttons allow to filter by class in the table view. In this example analog outputs are hidden and digital outputs are visible.
- These buttons allow to hide and expand the IO's state.
- This is a form for an analog output. Here a value can be entered and with a click on the "Set" button, the value will be changed.
- This is a switch for digital inputs. A click on the switch toggles the digital output.
3. settings section
This section can be found under the "Settings" menu on the main navigation and can only be accessed by RW or SU user. It consists of 4 pages:
Settings submenu
Settings page
On this page the network settings and connection to other servers can be configured.
It looks like the
Data page, but with tables and forms for the network and connection settings instead of the IO's data points.
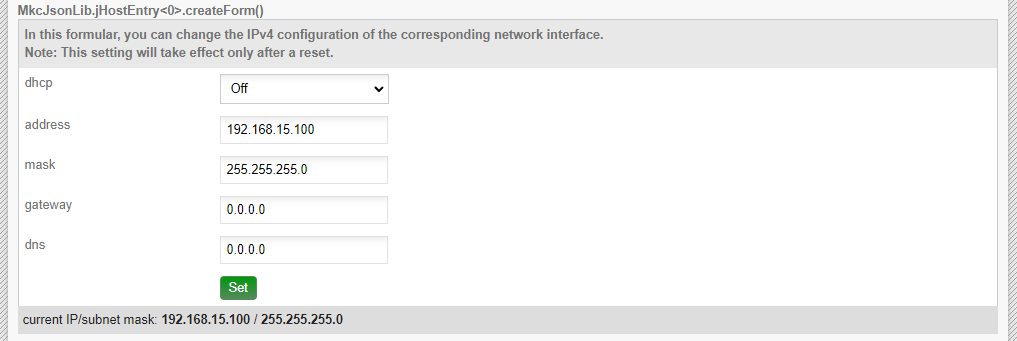
Form for changing Host configuration of a network interface
HTTP Access page
On this page the username and password for the RW user can be changed. (
looks like this)
Process page
Here the IO's can be configured.
It looks like the
Data page, but with tables and forms for the IO's configurations instead of IO's data points.
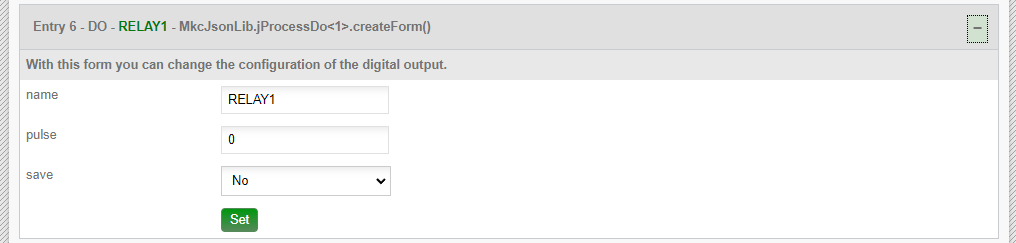
Form for a digital output's configuration
Date & Time page
Here the the system date and time can be configured.

date and time form
4. system section
This section can be found under the "System" menu on the main navigation and can only be accessed by the SU user. It consists of 5 pages:
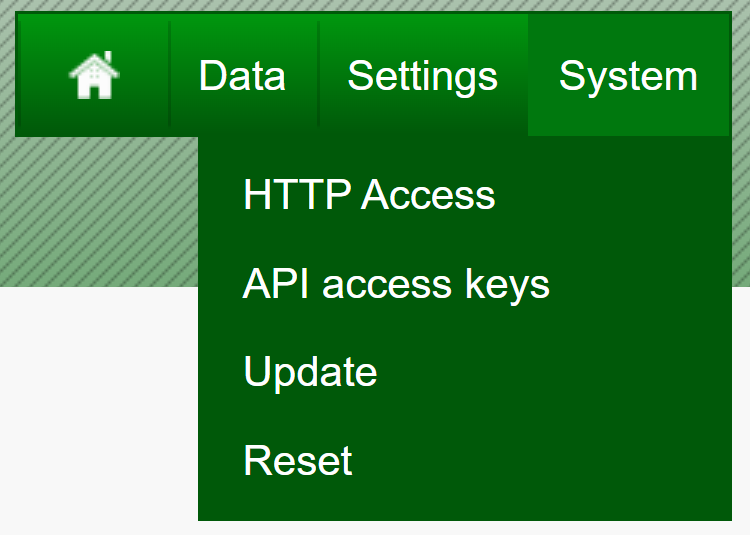
System submenu
System page
On this page, all additional CGIs/SSIs, accessible only by the SU user, are listed.
HTTP Access page
On this page the username and password for the SU user can be changed. (
looks like this)
API access keys page
On this page the read and write keys for the REST API can be changed.
Update page
A firmware update (fsu) or a homepage update (fhu) for the devices can be manually started here.

Update Forms
Reset page
A reset of the device can be triggered here.

Reset Form